I recently started dabbling with sketchnoting after being inspired the many sketchnotes that show up on my Twitter feed. Sketchnotes have around for a while and are mainly created to share one's reflection of a keynote, book, ideas, or favorite quote in a visual way. I love the colors and icons used in sketchnotes and wanted to try creating my own. I can also see this being an awesome lesson for students allowing them to express themselves creatively and visually.
According to Sketchnote Army, "Sketchnotes are purposeful doodling while listening to something interesting. Sketchnotes don't require high drawing skills, but do require a skill to visually synthesize and summarize via shapes, connectors, and text. Sketchnotes are as much a method of note taking as they are a form of creative expression."
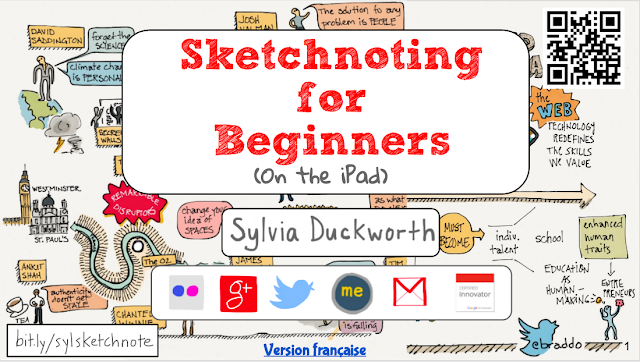
Here is an example of a sketchnote by Sylvia Duckworth. Click here to view more of her sketchnotes on Flikr. *Update* Check out Sylva's book Sketchnotes for Educators!

Here is an example of a sketchnote reflection of The Innovator's Mindset by George Couros created by Catherine Cabiness. View more of her work on her blog here.
When I decided to start sketchnoting, I first referenced Sylvia Duckworth's "Sketchnoting for Beginners" presentation for inspiration, ideas, and a starting point.
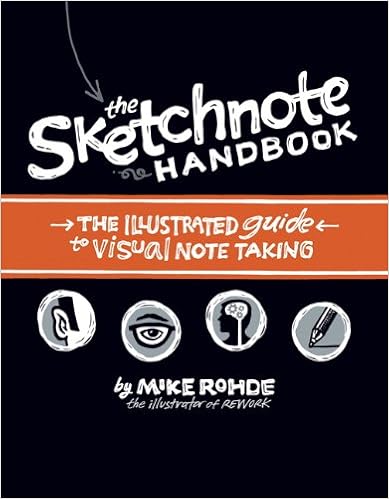
I also purchased the book The Sketchnote Handbook by Mike Rohde to learn techniques and also for inspiration and ideas.


To create these sketchnotes, I first took notes on a Google Doc and took pictures of slides with my phone. You can see how I drew some of my inspiration from the graphics used in the keynote presentation.
What is a sketchnote?
Here is an example of a sketchnote by Sylvia Duckworth. Click here to view more of her sketchnotes on Flikr. *Update* Check out Sylva's book Sketchnotes for Educators!
Here is an example of a sketchnote reflection of The Innovator's Mindset by George Couros created by Catherine Cabiness. View more of her work on her blog here.
 |
| Created by Catherine Cabiness @Ms_Cabiness |
Resources for Learning How To Sketchnote
I decided to try out Procreate app for iPad and the Musemee Notier V2 Precision Stylus because of Sylvia's recommendations. It took a long time to learn how to write and draw on an iPad. What finally worked for me was zooming in really close and moving the canvas closer to the edge of the iPad so my hand doesn't accidentally mark the Canvas when trying to write in the middle.
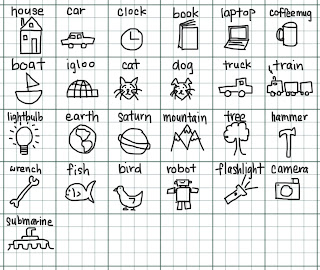
Here is what my first practice sketches look like after reading The Sketchnote Handbook. Yikes! I found writing to be the most difficult part of sketchnoting, but with practice, it got better. I had to learn to slow down as I am usually a fast (and messy) writer.

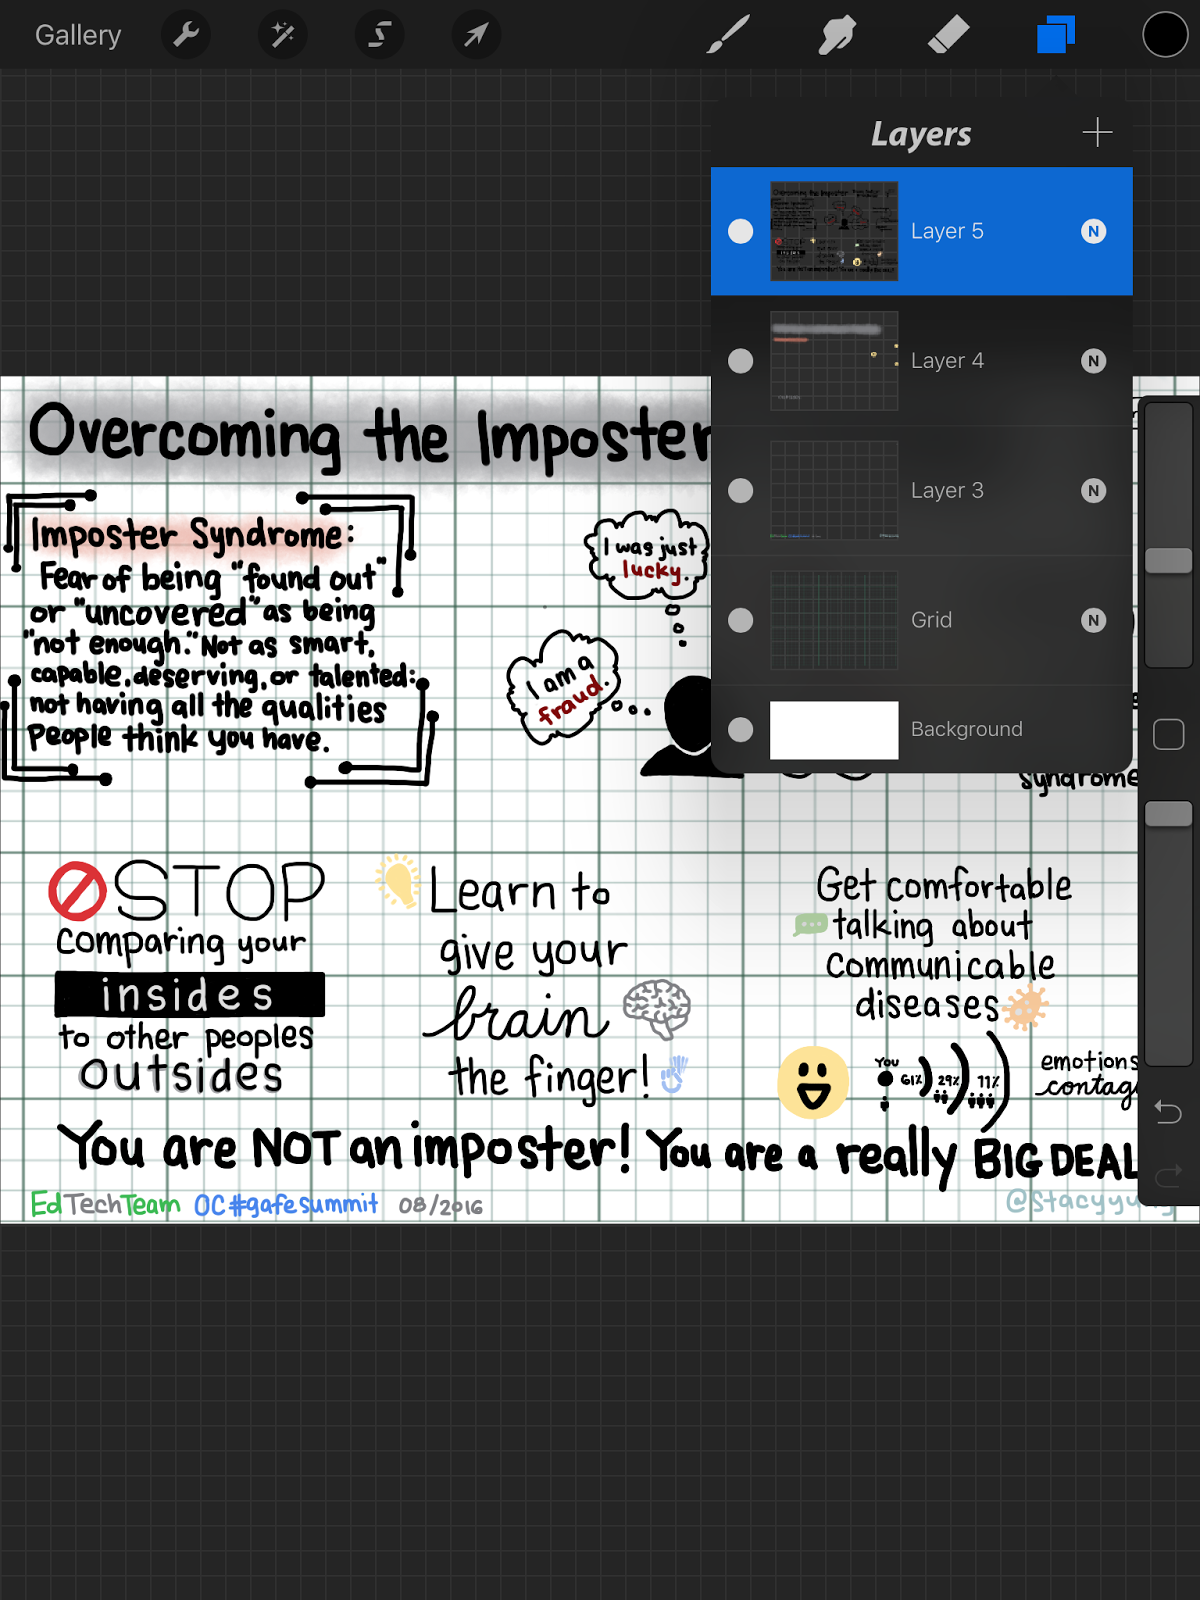
I have not tried other apps yet, but my favorite thing about Procreate is the ability to add and remove layers. I typically will have 4-6 layers per sketchnote. Here is how I utilize layers on Procreate:
- Layer 5 (top layer) - This is where I do all of my writing and draw the pictures that I want to stand out.
- Layer 4 - This layer is for coloring and/or shading behind my lettering and pictures.
- Layer 3 - I use this layer to insert images to trace or refer to or I use this as a template layer (see my EdTechTeam OC #gafesummit at the bottom of each of my sketchnotes)
- Layer 2 - This is my grid layer that I turn off when publishing my sketchnote. I searched for a grid image online and inserted it on this layer.
- Layer 1 (bottom layer) - This is my background color. I usually use white.
My First Sketchnotes
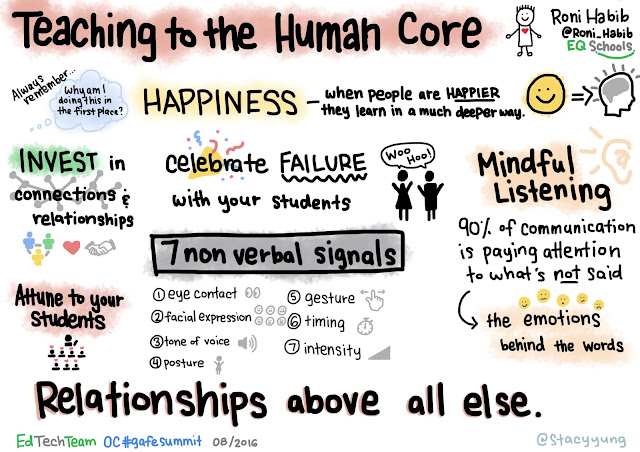
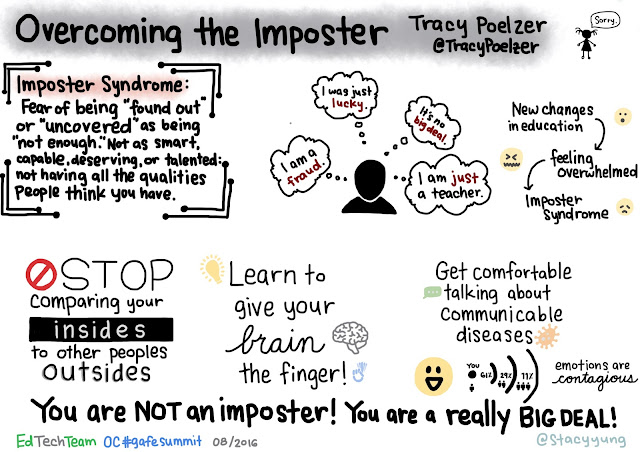
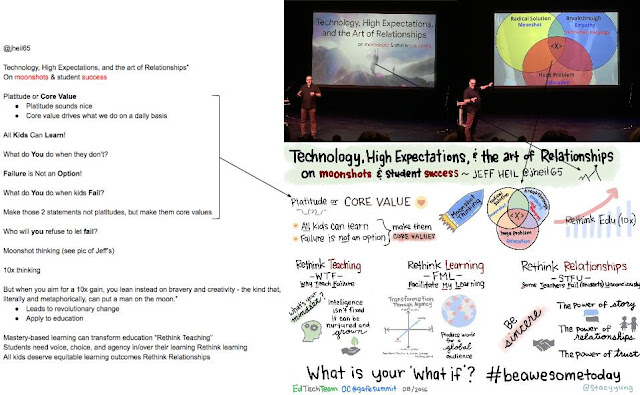
After recently attending the OC GAFE Summit, I created my first sketchnotes based on the three keynotes at the conference. My handwriting definitely became neater by the third keynote, but I still need to work on sizing of my writing and pictures.

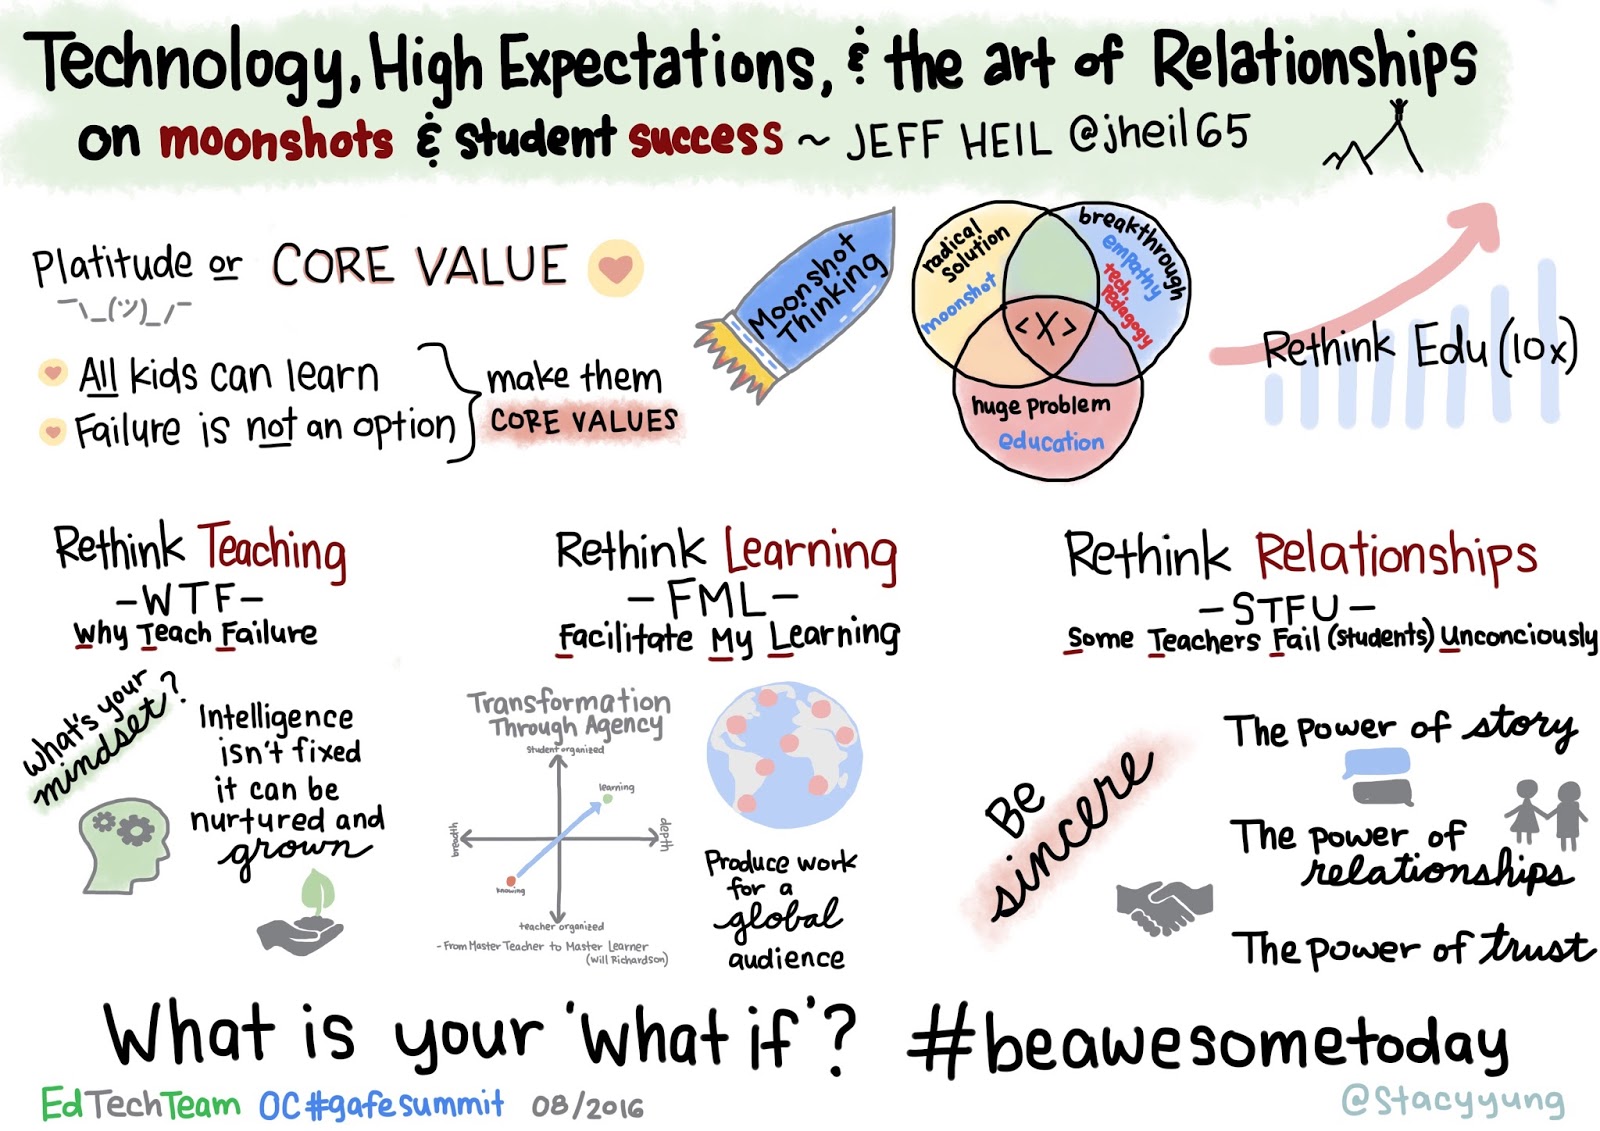

To create these sketchnotes, I first took notes on a Google Doc and took pictures of slides with my phone. You can see how I drew some of my inspiration from the graphics used in the keynote presentation.

What I found really cool about my first sketchnoting experience was seeing other sketchnotes created after the same keynote, but looking very different! It really goes to show how each of us interpreted and visualized the same keynote in different ways.
— Amanda Taylor (@TeacherAndGeek) August 12, 2016
@TeacherAndGeek ... I so love how the sketchnotes for this talk are all different and the same :) pic.twitter.com/0TzUOUVo1M— Jen Anderson (@teach3tech) August 13, 2016
I hope some of these tips help if you are just starting sketchnoting like I am. Happy sketchnoting!
What a wonderful blogpost describing your journey sketchnoting, Stacy! You have become so good at it in such a short time! Btw, do you know that there is a grid pen (under textures) that you can use to draw your grid instead of importing one? And you can make the grid bigger and smaller using the sliding tool on the left. Keep up the great work!
ReplyDeletePretty good post. I just stumbled upon your blog and wanted to say that I have really enjoyed reading your blog posts. Any way I'll be subscribing to your feed and I hope you post again soon. Big thanks for the useful info. jamb results checker
ReplyDelete